

ImJa 솔루션
2015.06.22 16:30:53 (*.134.169.166)
8266
ImJa 보드에서 ImJa 라이브러리를 이용하여 UDP/IP 샘플 프로그램을 작성해 보겠습니다. 소스 코드는 아래와 같습니다. 이전에 올린 TCP/IP 샘플과 비교해 보시면 매우 유사하다는 것을 아실 수 있습니다. 역시 내부적으로 C언어의 poll() 함수를 사용했기 때문이죠.
package udpSample;

import com.falinux.imja.Poll;
import com.falinux.imja.Udp;
import java.nio.ByteBuffer;

public class UdpSampleMain extends Udp {

    private Poll poll = null;

    private final ByteBuffer bufUdpRead = ByteBuffer.allocateDirect(1024);
    private final ByteBuffer bufUdpWrite = ByteBuffer.allocateDirect(1024);
    private int port = 0;


    public UdpSampleMain(int port) {
		super(port);		                // udp 오브젝트 생성
		this.port = port;			// 포트 정보

		poll = new Poll();			// 통신 라이브러리 초기화
		this.open();				// upd open
		poll.rebuild();				// 통신 객체 목록 갱신

	}

	@Override
	public int onDisconnect(long arg0) {
		// TODO Auto-generated method stub
		return 0;
	}


	@Override
	public int onError(long arg0) {
		// TODO Auto-generated method stub
		return 0;
	}


	@Override
	public int onHup(long arg0) {
		// TODO Auto-generated method stub
		return 0;
	}

	  /**
	  * JNI->Java Call
	  * JNI에서 데이터를 읽고 호출함.
	  */
	 @Override
	 public int onRead(long handle) {

	     int readBytes = this.read(bufUdpRead);	// 수신된 데이터 읽기

	     byte[] buf = new byte[readBytes];

	     bufUdpRead.flip();
	     bufUdpRead.get(buf, 0, readBytes);

	     System.out.println("Data from : " + getAddress());
	     System.out.println(new String(buf));

	     bufUdpRead.compact();

	     bufUdpWrite.put(buf);
	     bufUdpWrite.flip();
	     this.write(bufUdpWrite, getAddress().getHostString(), port);
	     bufUdpWrite.compact();

	     return readBytes;
	 }


	@Override
	public int onTimeOut(long arg0) {
		// TODO Auto-generated method stub
		return 0;
	}

	@Override
	public int onWrite(long arg0) {
		// TODO Auto-generated method stub
		return 0;
	}

    public void run() {
        while (true) {
            poll.pollDoLoop(100);
        }
    }


    public static void main(String[] args) {
		new UdpSampleMain( "127.0.0.1", 5000).run();
    }

}
샘플을 작성하기 위해 이클립스에서 자바 프로젝트를 생성합니다.
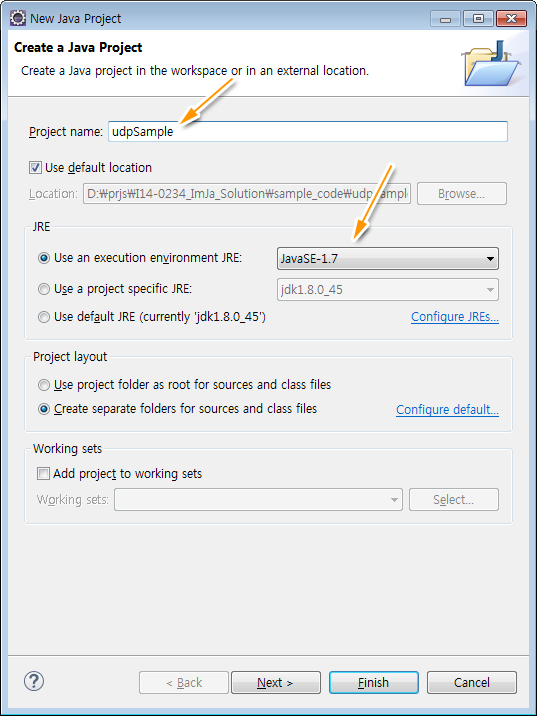
▲ UDP/IP 샘플을 위해 udpSample로 프로젝트를 생성합니다.
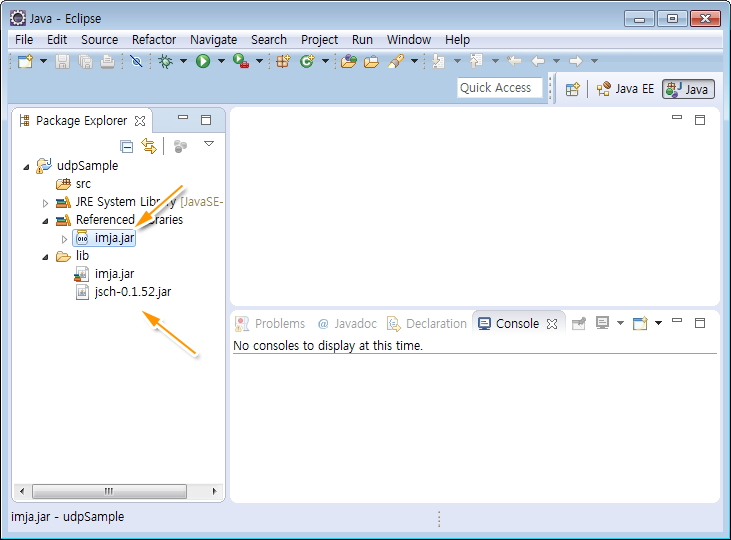
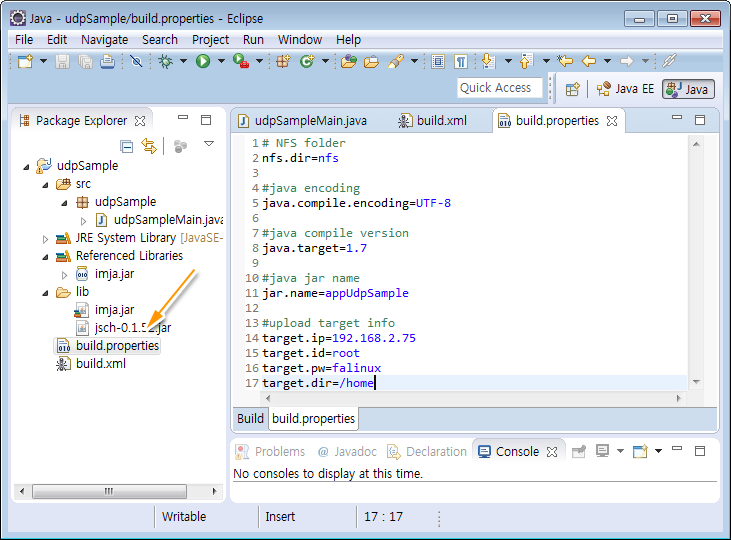
▲ 프로젝트가 생성되었습니다. 아래 글을 참고해서 jsch.jar과 imja.jar 라이브러리를 추가합니다.
필요한 라이브러리가 추가되었습니다. 이제 소스 코드를 작성하면 됩니다.
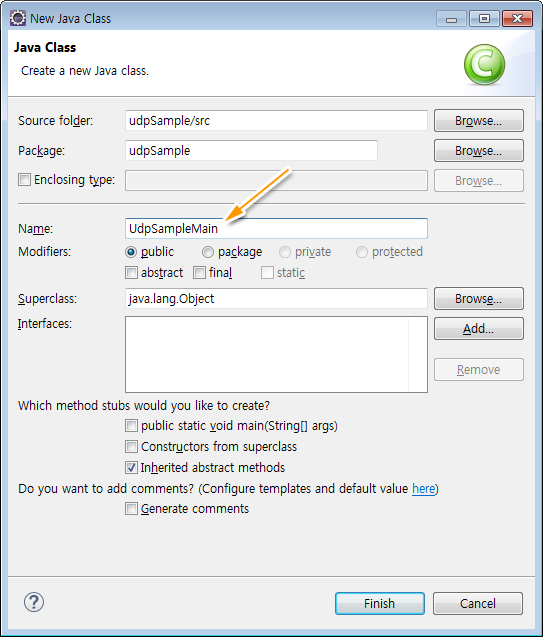
▲ src 폴더를 마오른쪽 버튼 클릭 후 New>>Class를 실행합니다. 샘플 객체 이름을 udpSampleMain이라고 입력합니다.
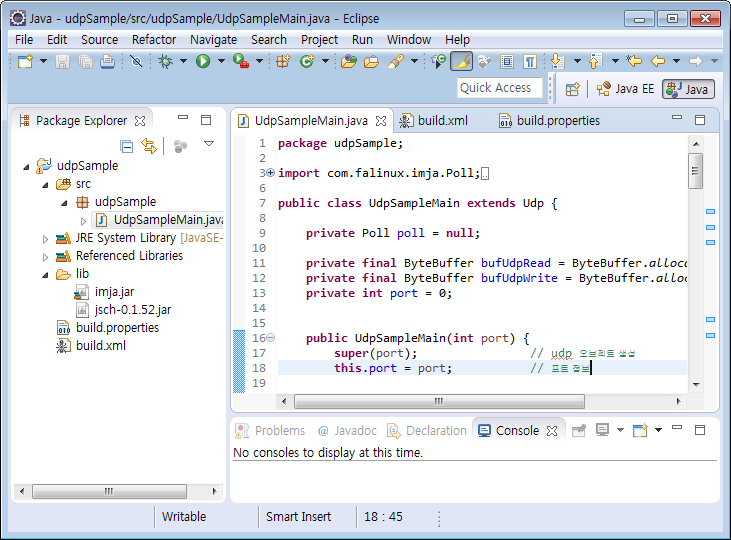
▲ udpSampleMain에 프로그램 소스 코드를 입력합니다.
▲ 소스 코드를 작성했으니 Build.xml과 build.propertyiies를 생성합니다. Build.xml과 build.propertyiies 내용은 아래와 같습니다.
=== build.xml
<?xml version="1.0" encoding="UTF-8"?>
<!-- 프로젝트 이름을 입력한다. -->
<project name= "ImJa_example" basedir= ".">

         <!-- 빌드 프로퍼티 파일 -->
         <property file= "build.properties" />

         <!-- Java Compile-->
         <target name= "compile" description= "Compile!!!" depends= "">
                <echo message="------------------------------" />
                <echo message="Java Compile!!!!  " />
                <echo message="------------------------------" />
                <javac target= "${java.target}"
                        nowarn="true"
                        deprecation="true"
                        debug="true"
                        listfiles="false"
                        failonerror="true"
                        optimize="false"
                        includeantruntime="false"
                        srcdir="${basedir}/src"
                        destdir="${basedir}/bin"
                        encoding="${java.compile.encoding}">
                </javac>
         </target>

         <!-- make jar-->
         <target name= "make_jar_nfs" depends= "compile">
                <echo message="------------------------------" />
                <echo message=" Make Jar : ${jar.name}.jar" />
                <echo message="------------------------------" />
                <mkdir dir= "./jar" />
                <jar destfile="${nfs.dir}/${jar.name}.jar" basedir="${basedir}/bin">
                </jar>
         </target>

         <!-- target device upload-->
         <target name= "target_device_upload" depends= "make_jar_nfs">
                <echo message="------------------------------" />
                <echo message=" Target device Upload" />
                <echo message="------------------------------" />
           <scp  file="${nfs.dir}/${jar.name}.jar"
            todir="${target.id}@${target.ip}:${target.dir}"
            password="${target.pw}"
                 trust="true"/>
         </target>

</project>
=== build.properites
# NFS folder
nfs.dir=nfs

#java encoding
java.compile.encoding=UTF-8

#java compile version
java.target=1.7

#java jar name
jar.name=appUdpSample

#upload target info
target.ip=192.168.2.75
target.id=root
target.pw=falinux
target.dir=/home
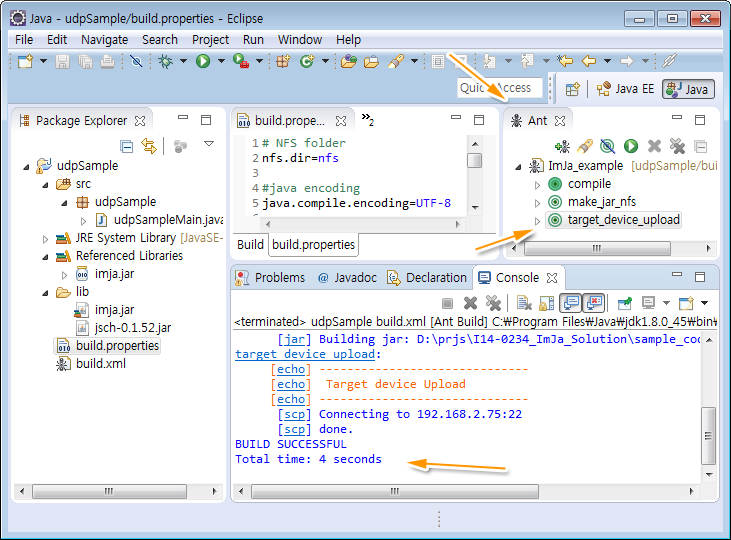
▲ Ant 스크립트를 이용하여 소스 파일을 컴파일하고 ImJa 보드로 실행 파일을 전송합니다.
컴파일과 ImJa 보드로 실행 파일을 전송했다면 ImJa 보드에서 예제 실행 파일을 실행합니다. 실행 방법은 위 이미지에서처럼 아래와 같이 입력하여 실행합니다.
]# java -cp appUdpSample.jar udpSample.UdpSampleMain
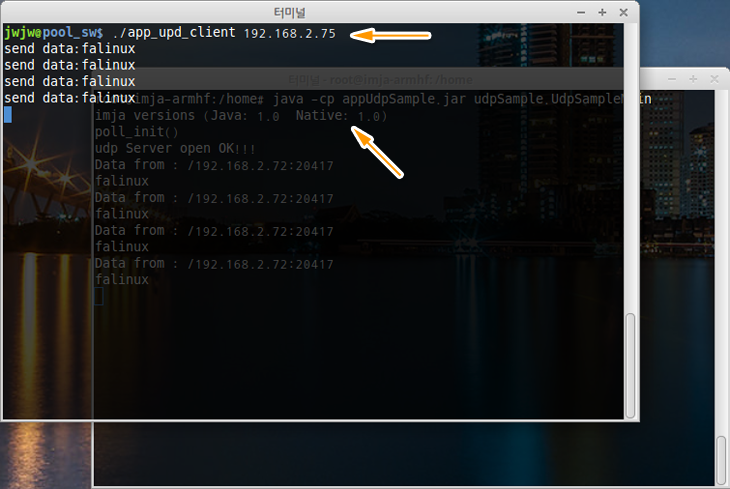 ▲ UDP/IP 문자열 전송 프로그램을 이용하여 포트 번호 5000으로 문자열을 전송하면 샘플 프로그램에 의해 에코되는 모습을 확인할 수 있습니다.
서두에서도 말씀을 드렸지만, ImJa 보드에서 TCP/IP, UDP/IP뿐만 아니라 시리얼 통신도 모두 poll.pollDoLoop()를 사용하면서 같은 방식으로 구현되는 것을 알 수 있습니다.
다음 글에서는 UDS를 사용하는 예제를 올리겠습니다. UDS는 유닉스 시스템에서 사용하는 IPC 방법 중 하나로 같은 시스템에서 실행 중인 어플리케이션 끼리 통신하는 방법입니다. 일반적으로 자바에서는 UDS를 사용할 수 없지만, ImJa 보드에서는 ImJa 라이브러리를 이용하여 UDS를 사용할 수 있지요. UDS 예제와 함께 UDS의 장점도 아울러 함께 설명하겠습니다.
