

그래픽 & 멀티미디어
gx 라이브러리에 이번에는 원 그리기를 추가했습니다. 실은 원 그리기 함수를 넣지 않으려고 했습니다. 타원 그리기로도 원을 그릴 수 있기 때문이죠. 그러나 임베디드 보드가 조금 느리다라는 생각과 여기 강좌란에서 완벽한 그래픽 라이브러리를 만든다는 것 보다는 교육을 위한 필요도 있어서 추가하기로 했습니다.
 역시 Device Context의 pen_color와 brush_color을 사용하여 테두리와 내부를 채웁니다. 한번의 원 그리기 루틴으로 내부의 선을 긋고 테두리에 점을 찍으면 빠르겠습니다만, 칼라 처리와 원의 테두리를 적용한다든지의 업그레이드를 위해 2번에 나누어 처리하겠습니다.
한번은 내부의 선을 긋고, 2번째 호출로 테두리 점을 찍습니다.
gx_circle()
| |||||||||
|
gx_circle()은 gx_rectangle와 마찬가지로 dc의 pen_color로 테두리를 그리고 brush_color로 내부 색을 채웁니다. 또한 pen_color 나 brush_color 가 clr_clear 일 경우 칠해지지 않습니다.
gx_circle()은 원을 그리는 함수 circle()을 호출하면서 내부의 색을 칠해주는 함수의 포인터와 외부의 테두리에 점을 찍은 함수의 포인터를 넘겨 줌으로써 하나의 원 그리기 루틴으로 두가지 작업을 처리합니다.
void gx_circle( dc_t *dc, int center_x, int center_y, int radius)
{
   if ( 0 == radius) return;

   if ( clr_clear != dc->brush_color)  circle( dc, center_x, center_y, radius, dc->brush_color, dc->hline);
   if ( clr_clear != dc->pen_color  )  circle( dc, center_x, center_y, radius, dc->pen_color  , circle_dot);
}
gx_circle()에서 색상에 따라 두번의 호출을 하면서 선을 그리는 hline()과 circle_dot() 함수를 넘겨 줍니다.
static void  circle( dc_t *dc, int center_x, int center_y, int radius, int color,
                                         void (*fun)( dc_t *dc, int, int, int, int))
{
   int      coor_x;
   int      coor_y;
   int      p_value;

   coor_x   = 0;
   coor_y   = radius;
   p_value   = 3 - 2 * radius;
   while   ( coor_x < coor_y)
   {
      draw_circle( dc, center_x, center_y, coor_x, coor_y, color, fun);  // 1/8의 원 출력
      if ( p_value < 0)
      {
         p_value   += 4 * coor_x +6;
      }
      else
      {
         p_value   += 4 * ( coor_x -coor_y) +10;
         coor_y--;
      }
      coor_x++;
   }
   if ( coor_x == coor_y)
      draw_circle( dc, center_x, center_y, coor_x, coor_y, color, fun); // 1/8의 원 출력
}
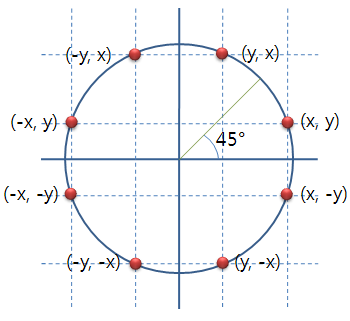
원의 1/8 부분을 대칭으로 8개의 부분을 모두 그리는 루틴입니다.
static void draw_circle( dc_t *dc, int center_x, int center_y,
          int coor_x, int coor_y, int color,
            void (*fun)( dc_t *c, int, int, int, int))
{
   int      y_dot;

   y_dot   = center_y +coor_y;
   fun( dc, center_x-coor_x, center_x+coor_x, y_dot, color);

   y_dot   = center_y -coor_y;
   fun( dc, center_x-coor_x, center_x+coor_x, y_dot, color);

   y_dot   = center_y +coor_x;
   fun( dc, center_x-coor_y, center_x+coor_y, y_dot, color);

   y_dot   = center_y -coor_x;
   fun( dc, center_x-coor_y, center_x+coor_y, y_dot, color);
}
이 함수에서 실제로 원을 그리는 함수는 fun() 입니다. 이 함수에 따라서 점의 테두리를 위한 점을 찍을 수 있으며, 또는 원의 내부를 칠할 수 있습니다.
원의 테두리 점을 찍는 함수는 인수로 받은 좌표를 좌우로 해서 점을 출력하게 됩니다.
static void circle_dot( dc_t *dc, int fst_x , int snd_x , int coor_y, int color)
{
   dc->set_pixel( dc, fst_x, coor_y, color);
   dc->set_pixel( dc, snd_x, coor_y, color);
}
sample 소스 설명
int   rand_color( dc_t *dc)     // 색상을 랜덤하게 구한다.
{
   return ( gx_color( dc, rand() %128 +128, rand() %128 +128, rand() %128 +128));
}

void  test_rectangle( dc_t *dc)
{
   int         coor_x, coor_y;
   int         radius;
   static int  ndx         = 0;

   coor_x         = rand() % dc->width;    // 원의 좌표를 랜덤으로 구합니다.
   coor_y         = rand() % dc->height;
   radius         = rand() % 100;

   if ( !( ndx % 60))   gx_clear( dc, clr_black); // 매 호출 60번째 마다
                                                  // 검정색으로 Clear
   switch ( (ndx++ / 20) % 3)                    // 매번 20번째 마다
   {                                              // 테두리와 브러쉬 색상 처리를 바꿈
   case 0   :
            dc->pen_color     = rand_color( dc);
            dc->brush_color   = clr_clear;
            break;
   case 1   :
            dc->pen_color     = clr_clear;
            dc->brush_color   = rand_color( dc);
            break;
   default  :
            dc->pen_color     = rand_color( dc);
            dc->brush_color   = rand_color( dc);
            break;
   }
   gx_circle( dc, coor_x, coor_y, radius);
   usleep( 150 *1000);
}

void  test( void)
{
   화면에 대한 Device Context를 구하고 성공하면 test_circle() 호출
}

int   main( void)
{
   gx 라이브러리를 초기화하고 성공하면 test() 호출
}
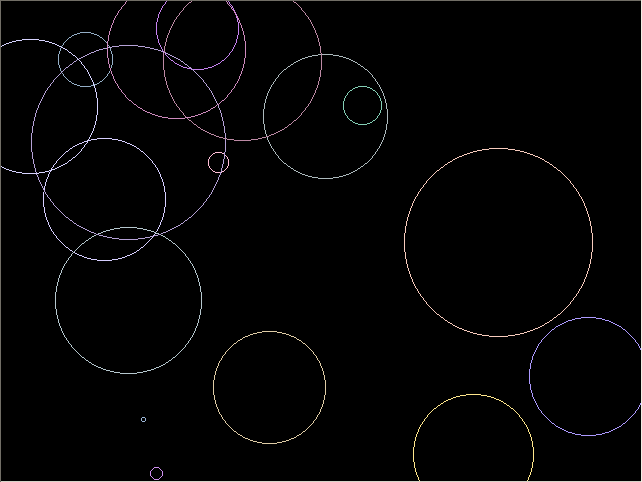
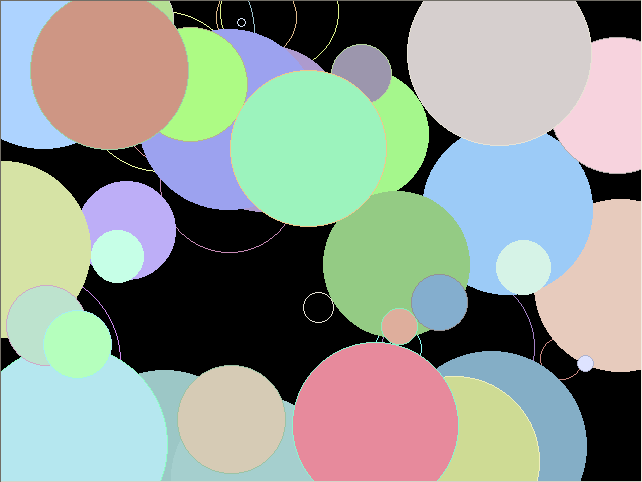
프로그램을 실행하면 아래와 같이 계속 원을 출력하게 됩니다.

태그: *그래픽 *라이브러리 *그래픽라이브러리
